343. Making video lectures part 2
This is a sequel to Pannell Discussion 334 on “Making video lectures”. I was asked by AARES to present a webinar on the topic, which prompted me to expand on on the tips and advice somewhat.
The webinar on 3 June 2020 was recorded and can now be viewed at the AARES web site here. (Scroll down to the webinar for Wednesday 3 June 2020).
Compared with part 1, the webinar goes more into practical issues. Here are some selected extracts, but there is more in the full video.
Pro’s and cons or pre-recording university lectures
Pro’s
Flexibility for students
Avoids death by Zoom
Better quality than lecture capture
Can be made to look polished and professional
Can be re-used
Short segments are better for attention
Sabbaticals are easier for your colleagues
You’re prepared when a pandemic hits
Cons
Takes time to skill up
Takes more time to prepare than a normal lecture
May need to purchase software and/or equipment
An online learning approach can be very passive for the student
More tips on making video lectures engaging
Mix up the types of presentations. Don’t only do stand-and-deliver lectures. Also include demonstrations and interviews with other experts. Ask questions for your students to think about. (Some software allows you to embed things like multi-choice questions in a video.) Make it a bit personal. Give your background, tell stories and give real examples you have been involved in.
Tips on equipment and software
In the webinar I show photos of my various equipment setups. For example, for recording a lecture, one option is to do it outdoor and to show the video of me talking at the side of the screen. Here’s what the setup looks like:

The computer, showing my slides, is on a tray on a camera tripod, and the computer is capturing the slides in a video as they progress. The camera (my iPhone) is positioned at the top of the screen and is videoing me talking. There is a lapel microphone on my shirt, either going into the iPhone or into a separate digital recorder in my pocket.
And here is an example of a video done that way:
Here is the setup in my office, where I stand in front of a green screen so that the video of me talking can be put in front of a slide or image.
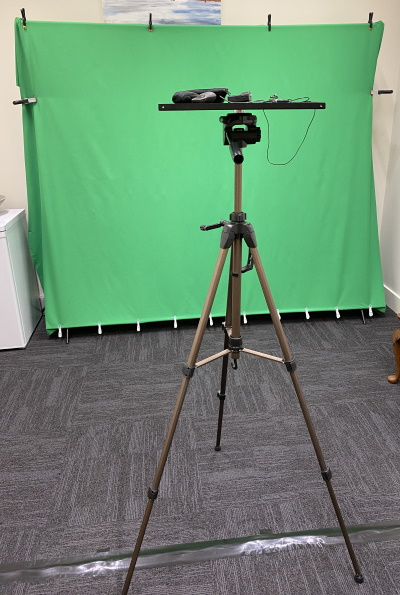
And here is an example of that sort of video.
Location
The location of recording your videos is critical. Avoid bright sunlight (squinting and shadows). Ideally light should come from in front, or from multiple lights above. Not from the side, and most importantly, not from behind, because you end up being just a dark silhouette in the video. Think about what will be in the background of your video (behind you). If doing it inside, choose a room with some or all of the following: carpet, curtains, soft furnishings. This helps to avoid the hollow empty sound you hear from many people on Zoom meetings.
Delivery
Position the camera at eye height. Look at the camera, or position the camera at the top of your camera screen and look at the slides you are lecturing about. Standing a bit further from camera helps to disguise the fact that you are not actually looking at the camera.
If you make a mistake, stop, wait about 5-10 seconds and have another go. This makes it easy to find the mistakes and edit them out later.
Exude energy and be positive. Humour helps if you can manage it. Don’t just read off slides – elaborate and clarify.
See the webinar video for more.
Further reading
Pannell, D.J. (2020). Making video lectures, Pannell Discussions 334.